Getting to know the catalog: Shelves and lists
The online catalog offers two ways to keep track of books and other items you’re interested in: shelves and lists.
Shelves
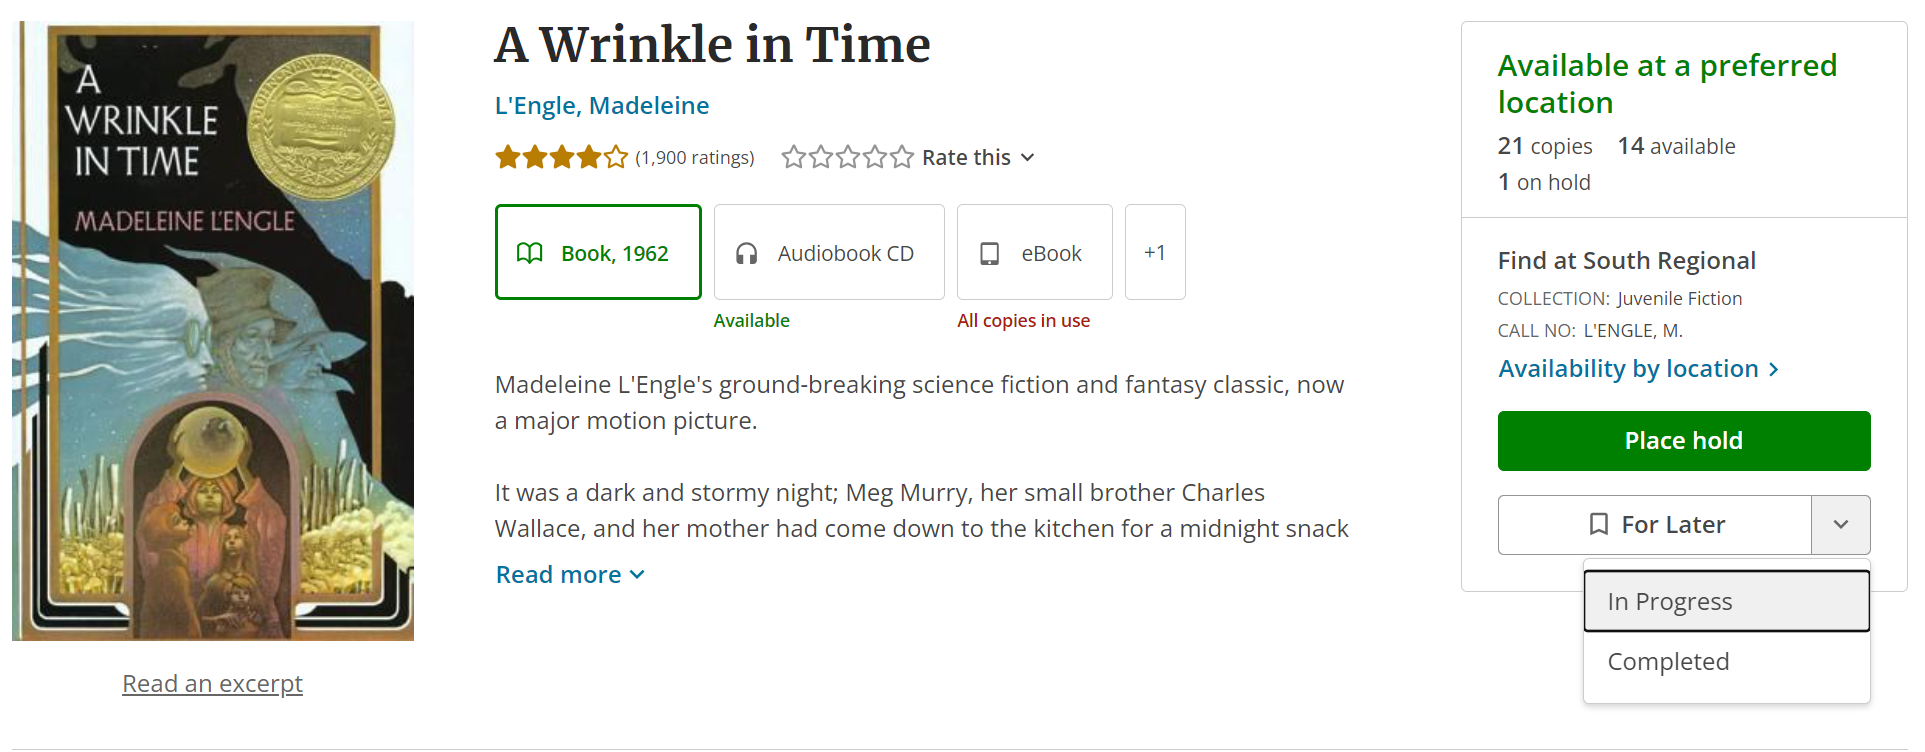
The idea of shelves may be familiar if you’ve used Goodreads or something similar. The shelves in the catalog are an optional tool to let you keep track of your own reading if you want to. They’re called For Later, In Progress, and Completed – For Later is basically a wishlist, and In Progress and Completed are for items you’re reading now or have already read. The shelves offer some nice options to help manage your reading. For instance, the For Later shelf has a button to check and see which items from your shelf are currently available to check out.
Before you start using the shelves, go in and double check your privacy settings, found on the account menu under “My Settings.” For new users, shelves default to private, but for older accounts, they may have defaulted to public (unlike holds and checkouts, which are never shared). You can set privacy preferences for both your shelf content and your activity feed (which includes any ratings or reviews you add).
An important thing to know about the shelves is that they don’t have any impact on the checkout system. Adding a book to your For Later shelf doesn’t request it for checkout – only placing a hold does that. And on the flipside, checking out a book will not move it from For Later to In Progress or Completed – to automatically track your checkouts, you can turn on the borrowing history option for your account, which is separate from the Completed shelf. Managing the shelves is a totally manual process. It’s also totally optional; the shelves are there if you want them, but you can place holds and check out items without ever using the shelves.
If you do want to use the shelves, you can add items using the button right above or below (depending on which page you’re on) the Place a Hold button. On most pages, the shelves button will default to For Later. Click that to add the item, or click the little arrow to see the other options:
If an item is already on your shelves, you’ll see the same button, but with the bookmark icon filled in:

Once you’ve got items on your For Later shelf, you can visit them by going in the account menu to My Collections > For Later Shelf.
You can move an item from one shelf to another or remove it altogether. You’ll see different buttons for that depending on which page you’re on: if you’re looking at the For Later shelf itself, you’ll see one that says Manage Item, or if you’re looking at your checkouts list or search results or other places, you can use the For Later button. In either case, clicking the button will get you a similar set of options:
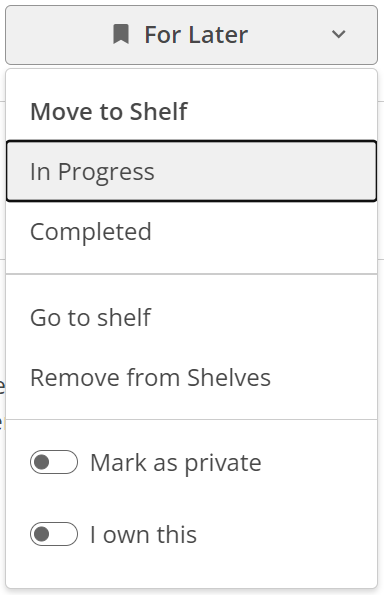
If you want to move the item to another shelf, click that shelf’s name. If you want to remove it altogether instead, click Remove from Shelves.
Lists
If you prefer to keep multiple different reading lists, want to share your lists with others, or generally need something a little different than what the shelves offer, then the list tool may be what you need. You can create as many lists as you like, add items, and give them a description. You can create lists by going in the account menu to My Collections > Lists.
When you’re saving a list, you can choose to make it public or private, but a lot of the list functionality is based on the idea that they can be a shareable document. There’s a minimum of 4 items before you can publish a list and a maximum of 100 items per list. Every time you make a change, like adding or removing items, your list will show up in your account as an unsaved draft. To resolve that, click Edit, then re-publish the list.

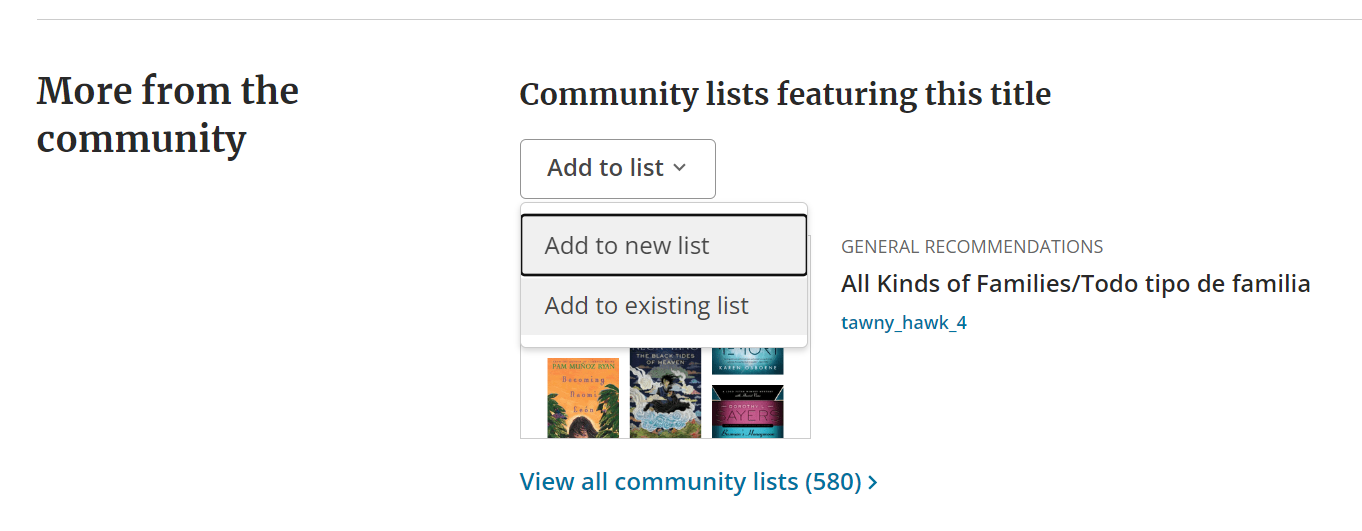
You can either add items to a list from the list edit view, or else do a regular search and then add an item from its details page. For that, click on the item title, then look down under the “More from the community” section. Under the “Community lists featuring this title” header, click the “Add to list” button – that will let you choose an existing list to put it on, or start a new one if you want:
When you’re ready to publish your list, you’ll be given several privacy options. You can make your list visible to anyone who’s using the catalog – if you do, it may show up in the “More from the community” section when someone is looking at one of the titles you’ve included. You can also make the list only visible to people who have the link. That option can be used for sharing the list with just a specific group of people, like a class or a club. Or you can set the list to only be visible to you.
If you want to share your list after it’s published, you can find the link on your lists page. The link that the list title points to is the shareable version:
